The 5-Minute Rule for Drywall Repair Jackson
Wiki Article
Everything about Drywall Repair Jackson
Table of ContentsSome Known Incorrect Statements About Drywall Repair Jackson Not known Factual Statements About Drywall Repair Jackson The smart Trick of Drywall Repair Jackson That Nobody is DiscussingNot known Facts About Drywall Repair JacksonDrywall Repair Jackson for DummiesLittle Known Facts About Drywall Repair Jackson.The Single Strategy To Use For Drywall Repair JacksonThe Basic Principles Of Drywall Repair Jackson
You'll reduce another piece as well as repeat the procedure up until you ultimately figure out how to place a screw in the middle to hold it in area up until you can affix the board to the existing wall. Next off, you will screw a patch to the center of the board. Which has a 50/50 chance of pushing the board into the wall, tearing the screws via, as well as falling under the cavity.They market points like Insta-back clips and self-adhesive mesh fixing kits that work quite well. But the repair work kits are extra costly, particularly when you have numerous holes to spot. And also the clips still require to be taped. Making a drywall California patch, on the various other hand, calls for no backing, no screws, and no tape.
They are held in place by leaving the facing paper larger than the hole to function as built-in joint tape. The advantages of utilizing a The golden state spot for drywall repair services are that they are cheaper, are fully adjustable to whatever dimensions you need, and are quicker than taping. You can also use a different density of drywall.
The Single Strategy To Use For Drywall Repair Jackson
Another plus is that the drywall paper is thinner than the majority of joint tape, making it simpler to float out. Simply an opening in the wall. It's a lengthy story involving miners misconstruing the term "sheetrock" as well as where the term hole-in-the-wall originated Not actually. The reality is, it probably began in California.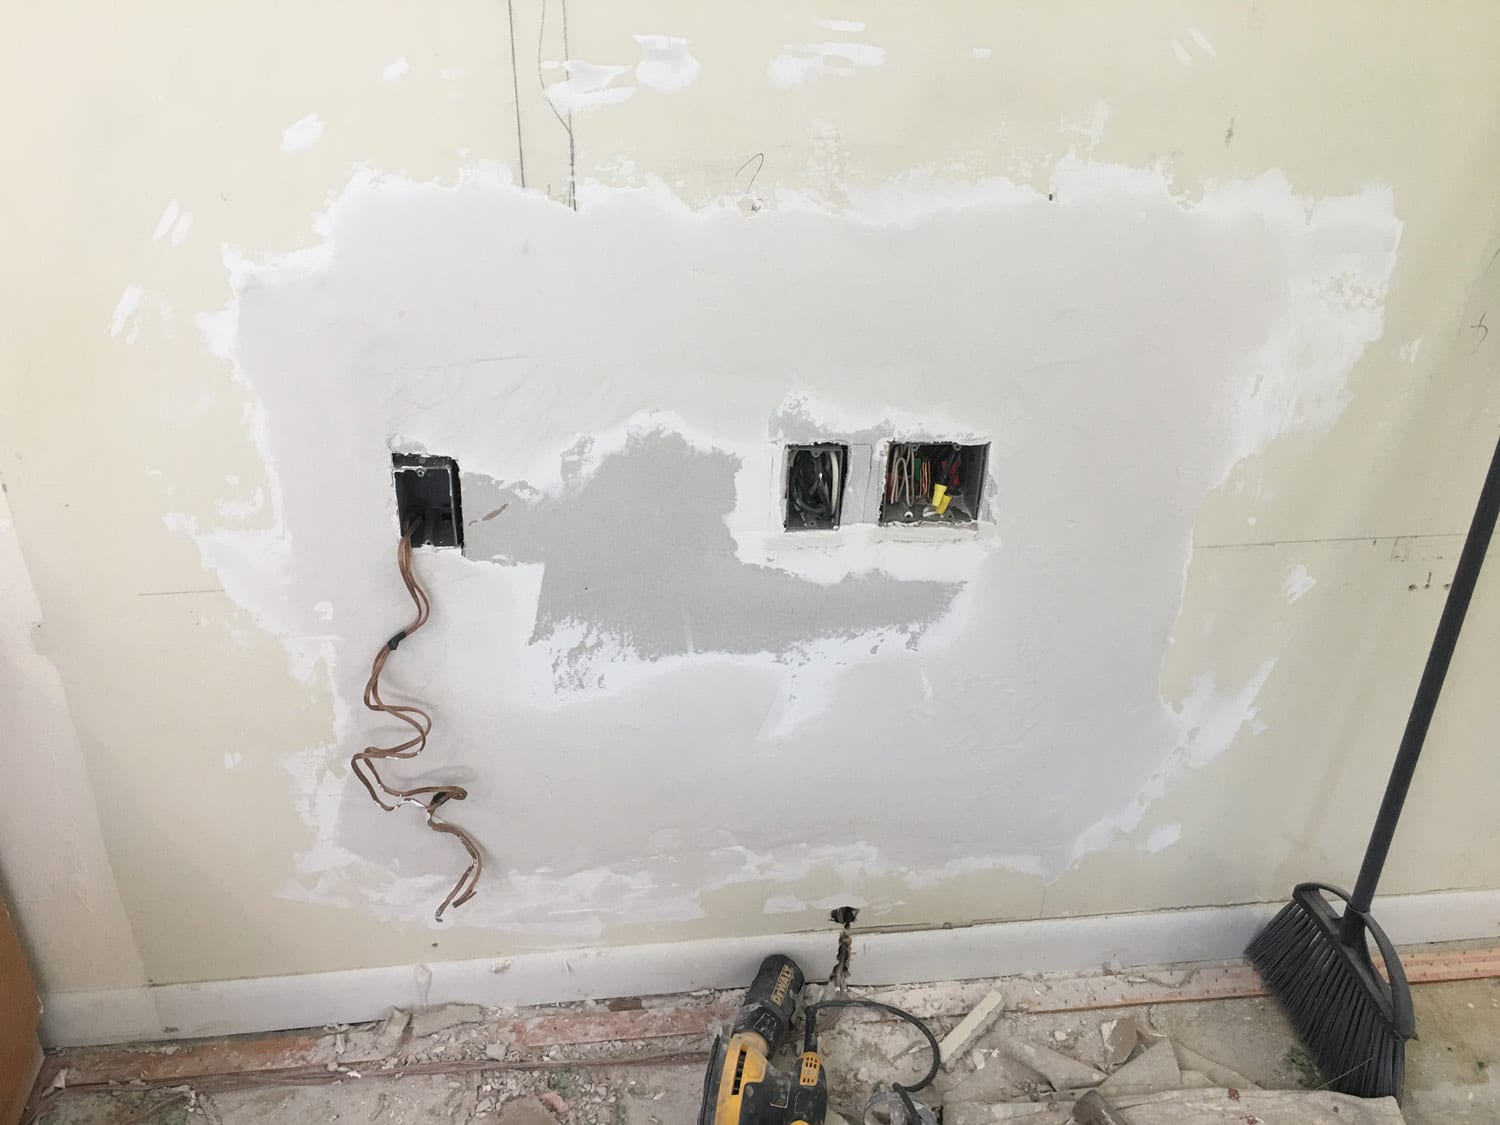
It's much simpler to start with something square than to try to form the repair service item to fit. Measuring the size of the opening, concerning 1" larger all the method around.
Drywall Repair Jackson for Dummies
Step 2: Cut a scrap piece of drywall about 2" bigger in each instructions. Determining for the size of the California spot.Noting the elevation. Again regarding 1" beyond the intermediary. Spot was gauged and also noted concerning 2" larger as well as 2" taller than the cutout. The preliminary patch is now prepared to note the behind. Action 3: Turn the scrap item inverted as well as center it under the hole. Mark the inside dimensions for your vertical cuts.
This will certainly be your straight cuts. Marking the height of the cutout onto the rear of the drywall spot. Step 5: Square up and also rack up the back side of the drywall. I recognize, this breaks everything you were instructed about reducing drywall. Trust me, this is the exemption.
Some Of Drywall Repair Jackson
Step 8: Carefully roll the snapped item by pulling your fingers in as well as pressing your thumbs out and away. It's most convenient if you rest the contrary side on a strong surface - Drywall Repair Jackson. Peeling the snapped item from the front paper Step 9: As you roll the piece, it separates from the front paper starting at the racked up edge as well as drawing out.You must have a repair piece with one drooping item of paper hanging off. The visit this web-site very first side peeled off. Action 10: Repeat steps 6-9 for each side.
Begin with the quickest sides. Peeling off the various other sides. Draw from the racked up side to the outside of the patch. Step 11: You ought to be entrusted a drywall plug bordered by loosened paper. Wipe any kind of residual gypsum on the paper. You'll need this to lay level on the wall and any type of crumbs will make that impossible.
Not known Details About Drywall Repair Jackson
Below are a couple of points to take note of: You desire your patch to be as near to purge with the wall as you can. You desire to fill the voids around the patch, however not so much that the mud drops into the cavity.Pro Suggestion: You do not wish to exhaust the paper. It will desire to tear faster rather than later on. Ok, so we have those details exercised. Keep those in mind as we experience these actions of setup. Action 1: Blend some hot mud. We like warm mud right here due to the fact that it dries much faster, doesn't reduce as much, as well as has excellent adhesive top qualities.
Action 2: Make a mud bed around the opening. Be sure to scrape some around the side to fill up the gaps. Scape mud around the opening and see to it to get some within. This will certainly be your adhesive and will shim any kind of gaps. Step 3: Currently take some mud and also smear it on the behind of the California spot.
The Basic Principles Of Drywall Repair Jackson
Step 8: Carefully roll the snapped piece by pulling your fingers in as well as pushing your thumbs out as well as away. It's simplest if you relax the contrary side on a solid surface. Peeling the snapped item from the front paper Action 9: As you roll the piece, it removes from the front paper starting at the scored side and also pulling out.
You must have a repair work item with one drooping item of paper hanging off. The initial side removed. Action 10: Repeat actions 6-9 for each and every side. Tip: start with your shortest piece. The smaller the piece the extra difficult it is to snap off. And the more you snap off the smaller sized the continuing to be items are.
The Greatest Guide To Drywall Repair Jackson
Begin with the fastest edges. Peeling off the various other sides. Draw from the scored side to the beyond the patch. Step 11: You need to be left with a drywall plug bordered by loosened paper. Wipe any kind of residual gypsum on the paper. You'll need this to lay level on the wall and any type of crumbs will make that difficult.Below are a number of things to keep in mind of: You desire your spot to be as near to flush with the wall visit the site as you can. If you have to err on one side, bear in mind that in is better than out. Unlike burps. You want to fill up the voids around the spot, but not so much that the mud comes under the tooth cavity.
Pro Suggestion: You don't want to strain the paper. It will intend to rip earlier instead of later on. Ok, so we have those information functioned out. Maintain those in mind as we experience these actions of installation. Step 1: Mix up some hot mud (Drywall Repair Jackson). We like hot mud here since it dries quicker, does not shrink as much, as well as has excellent adhesive high qualities.
Drywall Repair Jackson for Beginners
Action 2: Make a mud bed around the opening. Make sure to scratch some around the edge to load the spaces. Scape mud around the opening visit here and make certain to get some within. This will certainly be your adhesive and also will shim any gaps. Action 3: Currently take some mud and smear it on the behind of the California spot.:max_bytes(150000):strip_icc()/repair-a-large-hole-in-drywall-1824831_03_install_patch_1545-68477076e16b4775b65d51fe92b17122.jpg)
Report this wiki page